Interoperability is an important requirement for any wireless communication protocol supporting a mesh network topology. At this year’s Bluetooth World event, I had the opportunity to speak in a hands-on developer session about Bluetooth® Mesh Networking – provisioning and interoperability. By the end of this session, participants learned how to use three different Bluetooth Mesh Networking provisioners to provision three different developer kits from 3 different vendors. Attendees were then shown how to use the publish and subscribe mechanism of Bluetooth Mesh Networking to control the onboard LEDs (on or off) on all 3 kits.
This article outlines how to build a Bluetooth Mesh Networking demo like the ones used at Bluetooth World 2018.
Provisioners
The provisioner plays a key role in Bluetooth® Mesh Network, it takes the responsibility of:
- creating a mesh network
- provisioning new devices (unprovisioned) into the network
- sharing network credentials known as provisioning data (Bluetooth Mesh Networking Profile v1.0 section 5.4.2.5)
- executing model configuration
- managing the network
The demo from Bluetooth World 2018 used three provisioners:
- BlueZ v5.50 on Raspberry Pi3 (R Pi3), refer to this guide to set it up as a provisioner;
- nRF Mesh for iOS devices;
- nRF Mesh for Android devices;
- Parameters
Parameters
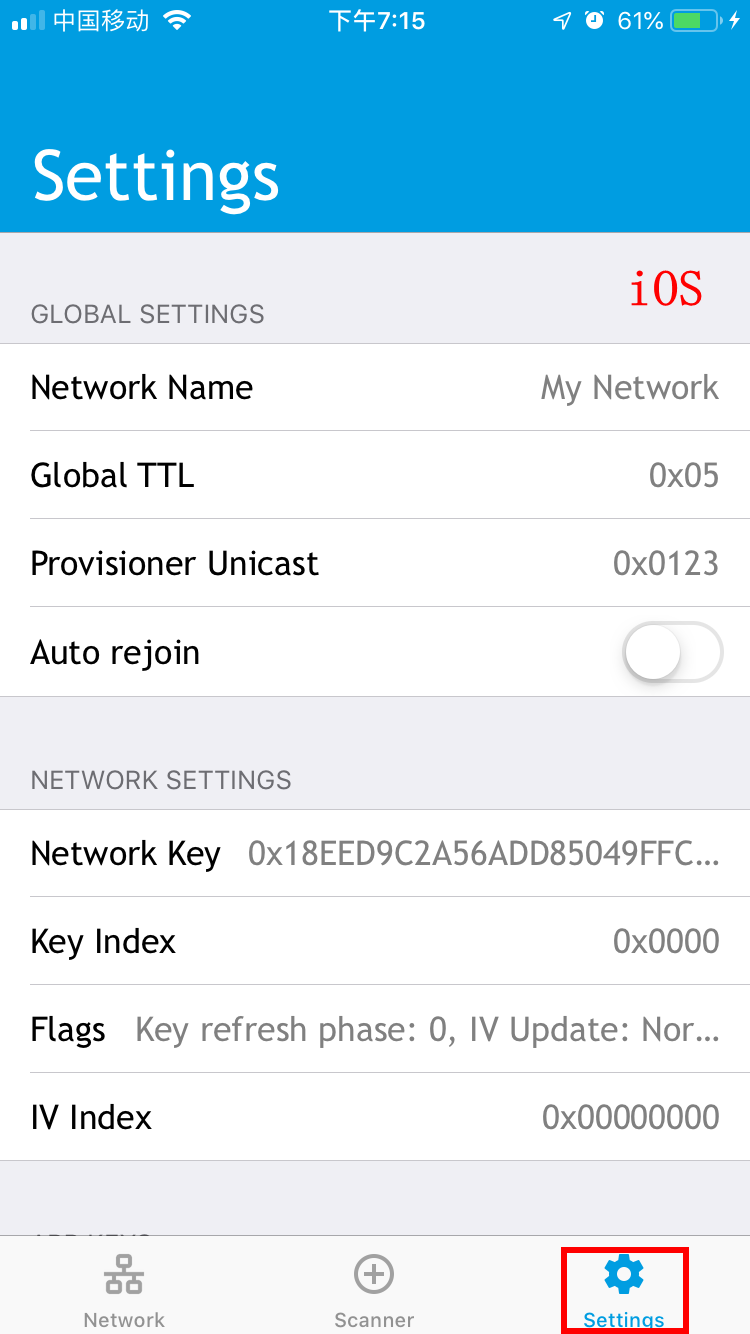
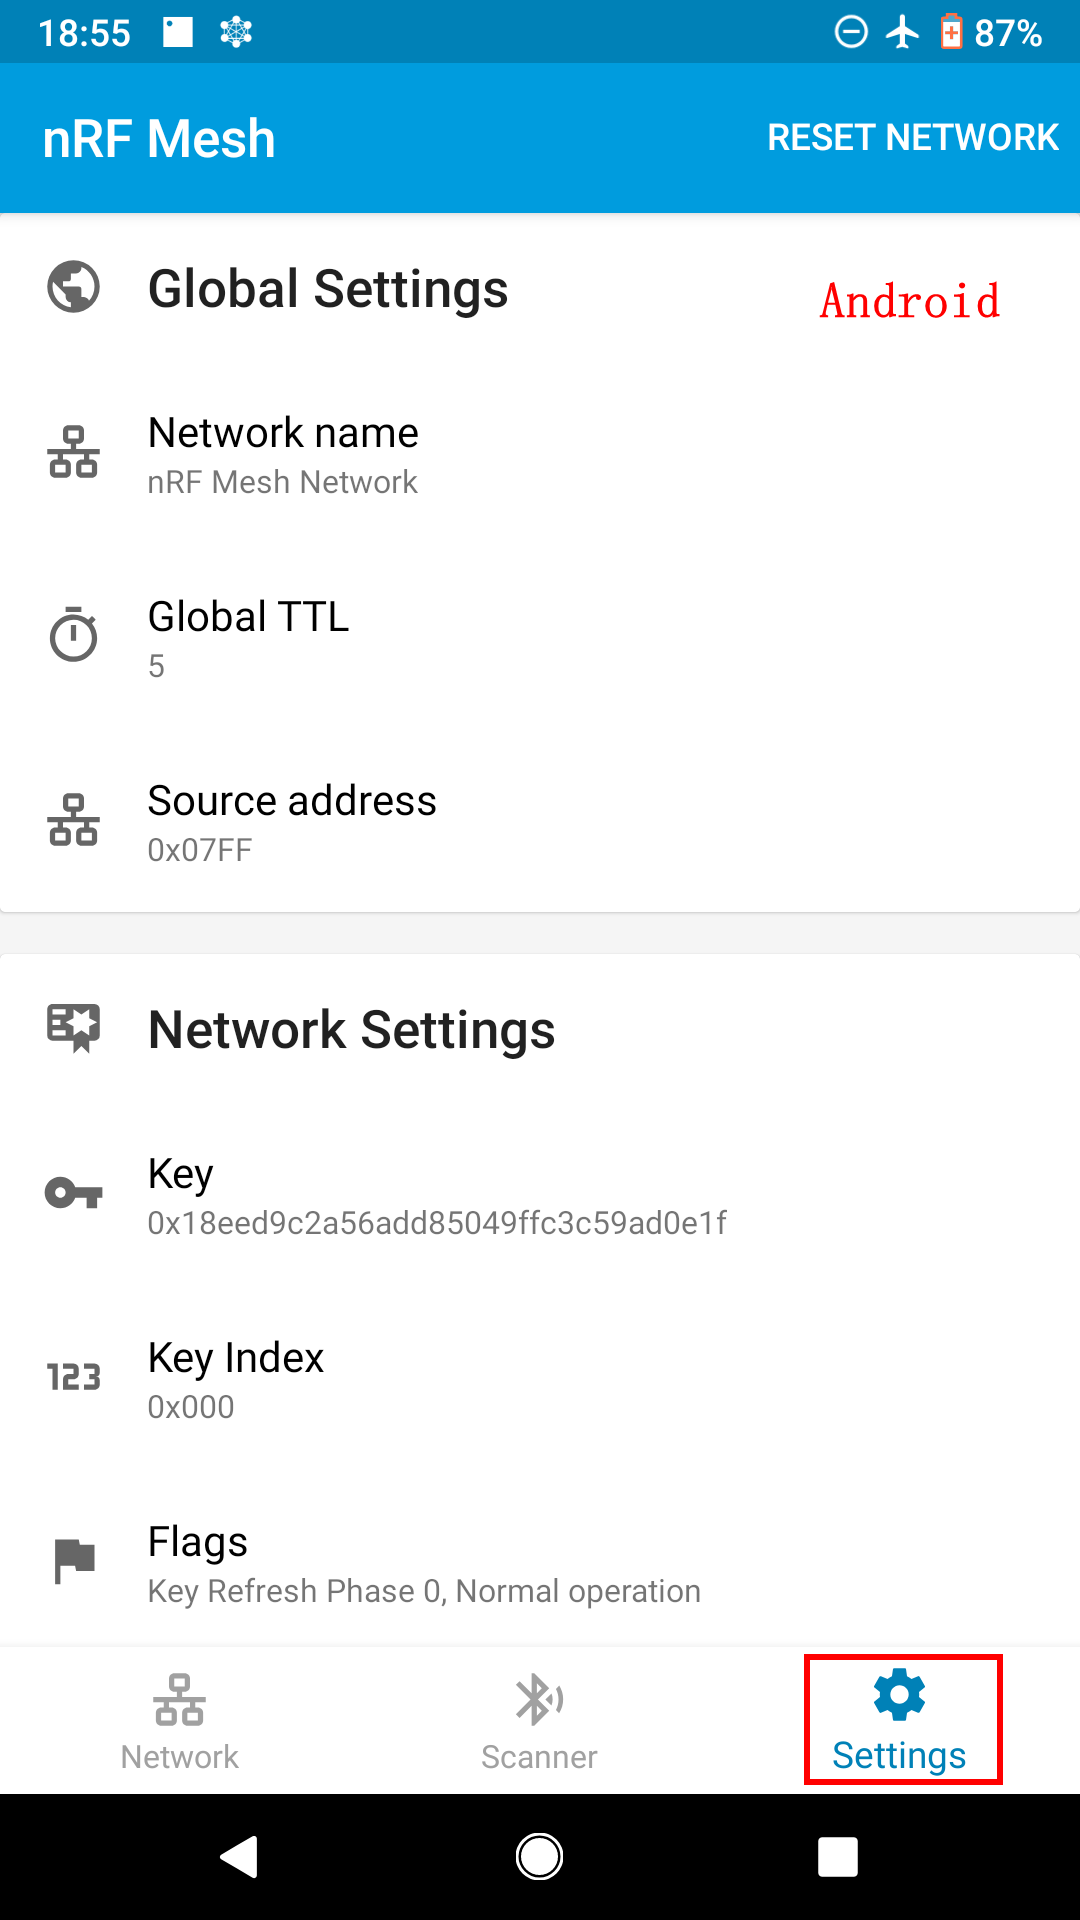
After installing the provisioner apps on target platforms like R Pi3, Android, or an iOS device, you need to configure them in order to make sure the nodes provisioned by these provisioners work together seamlessly and have proper interoperability.
There are five important parameters which need to be configured properly on each provisioner:
- Network Key (NeyKey)
- AppKey
- Key Index
- IV Index
- Unicast address
For the first four parameters, make sure they are the same for the different provisioners.
For the unicast address, the base unicast address allocated for new (unprovisioned) devices on different provisioners needs to be different, in case there is any chance of a duplicated unicast address in one network. In my demo:
- BlueZ’s base unicast address is 0x0100. BlueZ will assign the unicast address for new devices subsequently (e.g. 0x0101, 0x0102, etc.)
- The base unicast address of nRF Mesh Android App is 0x0300. It will assign the unicast address for new devices subsequently (e.g. 0x0301, 0x0302, etc.)
- The base unicast address of nRF Mesh iOS App is 0x0500. It will assign the unicast address for new device subsequently (e.g. 0x0501, 0x0502, etc.)
Thus, there are:
- 256 available unicast addresses which can be assigned by BlueZ from 0x0100 to 0x02FF;
- 256 available unicast addresses which can be assigned by nRF Mesh Android App from 0x0300 to 0x04FF;
- 31,488 available unicast addresses which can be assigned from 0x0500 to 0x7FFF because the valid range of unicast addresses is from 0x0001 ~ 0x7FFF. Please refer to Bluetooth Mesh Profile v1.0 section 3.4.2 and 3.4.3 for more detail.
Apps setting
For nRF Mesh Apps on iOS and Android, it is easy to configure because those apps have a UI. Tap the setting button at the bottom, as shown in the screenshots below.
 |  |
For BlueZ, please refer to this step-by-step guide, How to Deploy BlueZ v5.50 on Raspberry Pi3 and Use It, Part 2 to learn how to configure the Network Key, AppKey, Key Index, IV Index, and base Unicast Address on BlueZ.
This step-by-step guide will also show you how to build a new (unprovisioned) device, provisioned by meshctl on a Raspberry Pi3 (R Pi3) board.
As long as the above parameters (network key, AppKey, key index, IV index, and unicast address) are configurable, any provisioner, no matter if it runs on a smartphone or an embedded dev kit, can be used in this demo to provision the new device and prove the interoperability.
Model configuration
After configuring the provisioner properly, prepare the new (unprovisioned) devices; they will be provisioned by the provisioners prepared from the section above. Any Bluetooth Mesh Networking dev kit, as long as it supports the models of Generic OnOff Server and/or Generic OnOff Client, can be used in this demo.
In the demo from Bluetooth® World, three different vendors’ dev kits were used. These dev kits, from Nordic Semiconductor, Cypress, and Silicon Labs, already had Generic OnOff Server and/or Generic OnOff Client models support: you don’t need coding, just flash the example firmware and it’s done.
You can use any provisioner to provision a kit to make it a node in the network. After provisioning is complete, please make sure:
- If the node includes Generic OnOff Server
- Bind its Generic OnOff Server with the AppKey you configured
- Make this Generic OnOff Server subscribe to a certain group address. The valid range is from 0xC000 to 0xFEFF. I used 0xC000.
- If the node includes Generic OnOff Client
- Bind its Generic OnOff Client with the AppKey you configured
- Make the Generic OnOff Client publish message at a certain group address. The valid range is from 0xC000 to 0xFEFF. I used 0xC000
After completing the above model configuration, use the Generic OnOff Client to control the Generic OnOff Server’s state to on or off; intuitive appearance of the LEDs can be controlled on or off.
Moreover
After Bluetooth World, I had an opportunity to use the STMicroelectronics kit. After following the above guide, I successfully added it to this demo. Moving forward, I hope to use an even wider range of products in this demo.
Discover more developer resources, and learn more about developing with Bluetooth Mesh Networking.